-
InfluxDB 1.8.1 윈도우에서 node.js 사용WEB 2023. 7. 17. 18:26

node.js에서 influxdb를 사용해보자
라이브러리 설치
npm install --save @influxdata/influxdb-client
npm install --save @influxdata/influxdb-client-apis
influxdb내에 data, meta, wal폴더 추가

윈도우 상에서 실행할 시 javascript로 작성된 프로그램에서 아래와 같이 http 403 에러메시지가 나올 수 있다.

influxdb.conf에서 아래 해당하는 부분 수정한다.
[meta]
  # Where the metadata/raft database is stored
  dir = "C:/Program Files/InfluxData/influxdb/influxdb-1.8.10-1/meta"

  # Automatically create a default retention policy when creating a database.
 retention-autocreate = true

  # If log messages are printed for the meta service
  # logging-enabled = true

###
### [data]
###
### Controls where the actual shard data for InfluxDB lives and how it is
### flushed from the WAL. "dir" may need to be changed to a suitable place
### for your system, but the WAL settings are an advanced configuration. The
### defaults should work for most systems.
###

[data]
  # The directory where the TSM storage engine stores TSM files.
  dir = "C:/Program Files/InfluxData/influxdb/influxdb-1.8.10-1/data"

  # The directory where the TSM storage engine stores WAL files.
  wal-dir = "C:/Program Files/InfluxData/influxdb/influxdb-1.8.10-1/wal"

  ...중략

  [http]
  # Determines whether HTTP endpoint is enabled.
   enabled = true

  # Determines whether the Flux query endpoint is enabled.
   flux-enabled = true

  # Determines whether the Flux query logging is enabled.
  # flux-log-enabled = false

  # The bind address used by the HTTP service.
   bind-address = ":8086"

  # Determines whether user authentication is enabled over HTTP/HTTPS.
   auth-enabled = false

  # The default realm sent back when issuing a basic auth challenge.
  # realm = "InfluxDB"

  # Determines whether HTTP request logging is enabled.
   log-enabled = true
influxdb conf파일 적용하여 실행influxd -config ./influxdb.conf
데이터베이스 생성
>influx
>create database xxx
node.js javascript 파일 작성
아래 내용을 참고하면 2.x버젼대에 최적화 되어있고,
ES6적용으로 인해 라이브러리를 import한다.
https://github.com/influxdata/influxdb-client-js/tree/master
GitHub - influxdata/influxdb-client-js: InfluxDB 2.0 JavaScript client
InfluxDB 2.0 JavaScript client. Contribute to influxdata/influxdb-client-js development by creating an account on GitHub.
github.com
1.8버젼을 적용하고 CommonJS로 변경한 부분은 아래와 같다.
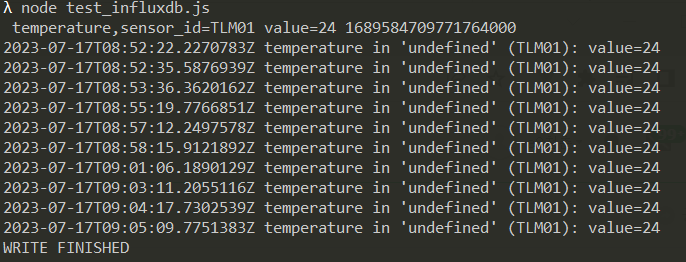
'use strict'

var InfluxDB = require("@influxdata/influxdb-client");

/** InfluxDB v2 URL */
const url = process.env['INFLUX_URL'] || 'http://localhost:8086'
/** InfluxDB authorization token */
const token = process.env['INFLUX_TOKEN'] || 'my-token'
/** Organization within InfluxDB  */
const org = process.env['INFLUX_ORG'] || 'my-org'
/**InfluxDB bucket used in examples  */
const bucket = 'xxx'
// ONLY onboarding example
/**InfluxDB user  */
const username = 'my-user'
/**InfluxDB password  */
const password = 'my-password'

/**
 * Instantiate the InfluxDB client
 * with a configuration object.
 **/
const influxDB = new InfluxDB.InfluxDB({ url, token })

/**
 * Create a write client from the getWriteApi method.
 * Provide your `org` and `bucket`.
 **/
const writeApi = influxDB.getWriteApi('', bucket)

/**
 * Apply default tags to all points.
 **/
writeApi.useDefaultTags({ region: 'west' })

/**
 * Create a point and write it to the buffer.
 **/
const point1 = new InfluxDB.Point('temperature')
  .tag('sensor_id', 'TLM01')
  .floatField('value', 24.0)
console.log(` ${point1}`)

writeApi.writePoint(point1)

/**
 * Flush pending writes and close writeApi.
 **/
writeApi.close().then(() => {
  console.log('WRITE FINISHED')
})


/**
 * Instantiate the InfluxDB client
 * with a configuration object.
 *
 * Get a query client configured for your org.
 **/
const queryApi = new InfluxDB.InfluxDB({url, token}).getQueryApi('')

/** To avoid SQL injection, use a string literal for the query. */
const fluxQuery = 'from(bucket:"'+bucket+'") |> range(start: 0) |> filter(fn: (r) => r._measurement == "temperature")'

const myQuery = async () => {
  for await (const {values, tableMeta} of queryApi.iterateRows(fluxQuery)) {
    const o = tableMeta.toObject(values)
    console.log(
      `${o._time} ${o._measurement} in '${o.location}' (${o.sensor_id}): ${o._field}=${o._value}`
    )
  }
}

/** Execute a query and receive line table metadata and rows. */
myQuery()
실행
Delete 구문이 안되어서 이것저것 시도한 결과 위의 라이브러리는 2.x 대 버전을 기준으로 만들어진것임을 추측하였고,
기존 구버젼에 대해 찾아본 결과 "influx"라는 라이브러리가 따로 있음을 발견하였다.
1.x버젼과 2.x버젼의 큰 차이는 구문차이라고 하는데 1.x버젼은 SQL구문위주인듯 하다.
////////////////////////////////////////// V 1.8 //////////////////////////////////////////////////////////////// const Influx18 = require('influx'); const influx18 = new Influx18.InfluxDB({ host: '127.0.0.1', // InfluxDB 호스트 database: 'xxx', // 사용할 데이터베이스 }); // 삭제할 쿼리 작성 const deleteQuery = `delete from temperature where time < now() - 1m`; // 데이터 삭제 함수 function deleteData() { influx18.query(deleteQuery) .then(() => { console.log('데이터가 성공적으로 삭제되었습니다.'); }) .catch((error) => { console.error('데이터 삭제 중 오류가 발생했습니다:', error); }); } // 데이터 삭제 실행 deleteData(); // 데이터 삽입 함수 function insertData() { const dataPoint = { measurement: 'temperature', // 측정값 이름 tags: { tag_key: 'TLM01' }, // 태그값 설정 fields: { value: 24.0 }, // 값 설정 }; influx18.writePoints([dataPoint]) .then(() => { console.log('데이터가 성공적으로 삽입되었습니다.'); }) .catch((error) => { console.error('데이터 삽입 중 오류가 발생했습니다:', error); }); } // 데이터 삽입 실행 insertData(); // 데이터 조회 함수 function fetchData() { //const query = `SELECT * FROM temperature WHERE time >= 0s`; const query = `SELECT * FROM temperature WHERE time >= '2023-07-17T13:56:00Z' AND time <= '2023-07-17T13:59:00Z'`; influx18.query(query) .then((result) => { const len = result.length; console.log('조회 결과:', len); for(var i = 0; i < len; i++) { result[i].adddata = i; } console.log('조회 결과:', result[0]); //countData(); }) .catch((error) => { console.error('데이터 조회 중 오류가 발생했습니다:', error); }); } // 데이터 조회 실행 fetchData(); // 랜덤 값 생성 함수 function getRandomValue() { return Math.random() * 100; // 0부터 100 사이의 랜덤 값 생성 } async function insertDataSynchronously() { for (let i = 0; i < 10000; i++) { const timestamp = new Date().toISOString(); // 현재 시간을 ISO 8601 형식으로 변환 const dataPoint = { measurement: 'temperature', // 측정값 이름 tags: { tag_key: 'TLM01' }, // 태그값 설정 fields: { value: getRandomValue() }, // 값 설정 }; await influx18.writePoints([dataPoint]); } console.log('데이터가 성공적으로 삽입되었습니다.'); countData(); } // 데이터 삽입 실행 insertDataSynchronously().catch((error) => { console.error('데이터 삽입 중 오류가 발생했습니다:', error); }); // 데이터 개수 조회 함수 function countData() { const query = 'SELECT count(*) FROM temperature'; influx18.query(query) .then((result) => { const count = result[0].count_value; console.log('데이터 개수:', count); }) .catch((error) => { console.error('데이터 개수 조회 중 오류가 발생했습니다:', error); }); } // 데이터 개수 조회 실행 countData();'WEB' 카테고리의 다른 글
Quasar 외곽선 아이콘 사용하는 방법 (0) 2023.08.25 InfluxDB 1.8.10 정리 (0) 2023.07.18 InfluxDB 1.8.1 윈도우 설치 (0) 2023.07.17 Node.js 연동 ajax 기본 (0) 2022.09.29 pm2 명령어를 찾을 수 없습니다. (0) 2022.09.27